
A step by step tutorial to test Android backup and restore
Environment
- Android 7.0+
- Google Play is present on device
Prepare device
- Add your Google Account, e.g.
shizhen.sg@gmail.comto your device. - Select the Google Account
shizhen.sg@gmail.comas backup account inside device backup settings. Usually, it is under Settings -> System -> Backup -> Account. - Remember to turn on Back up to Google Drive. See below screenshot
.png)
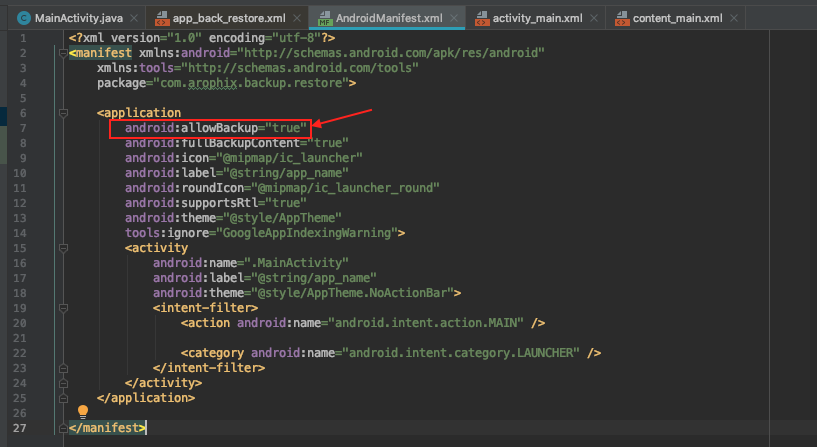
Turn on Android app allowBackup attribute
Set android:allowBackup="true" inside AndroidManifest.xml. See below screenshot:
Test flows
- Install BackupRestore.apk.
- Open the app and modify the two
EditTextfields, click on button SAVE. E.g.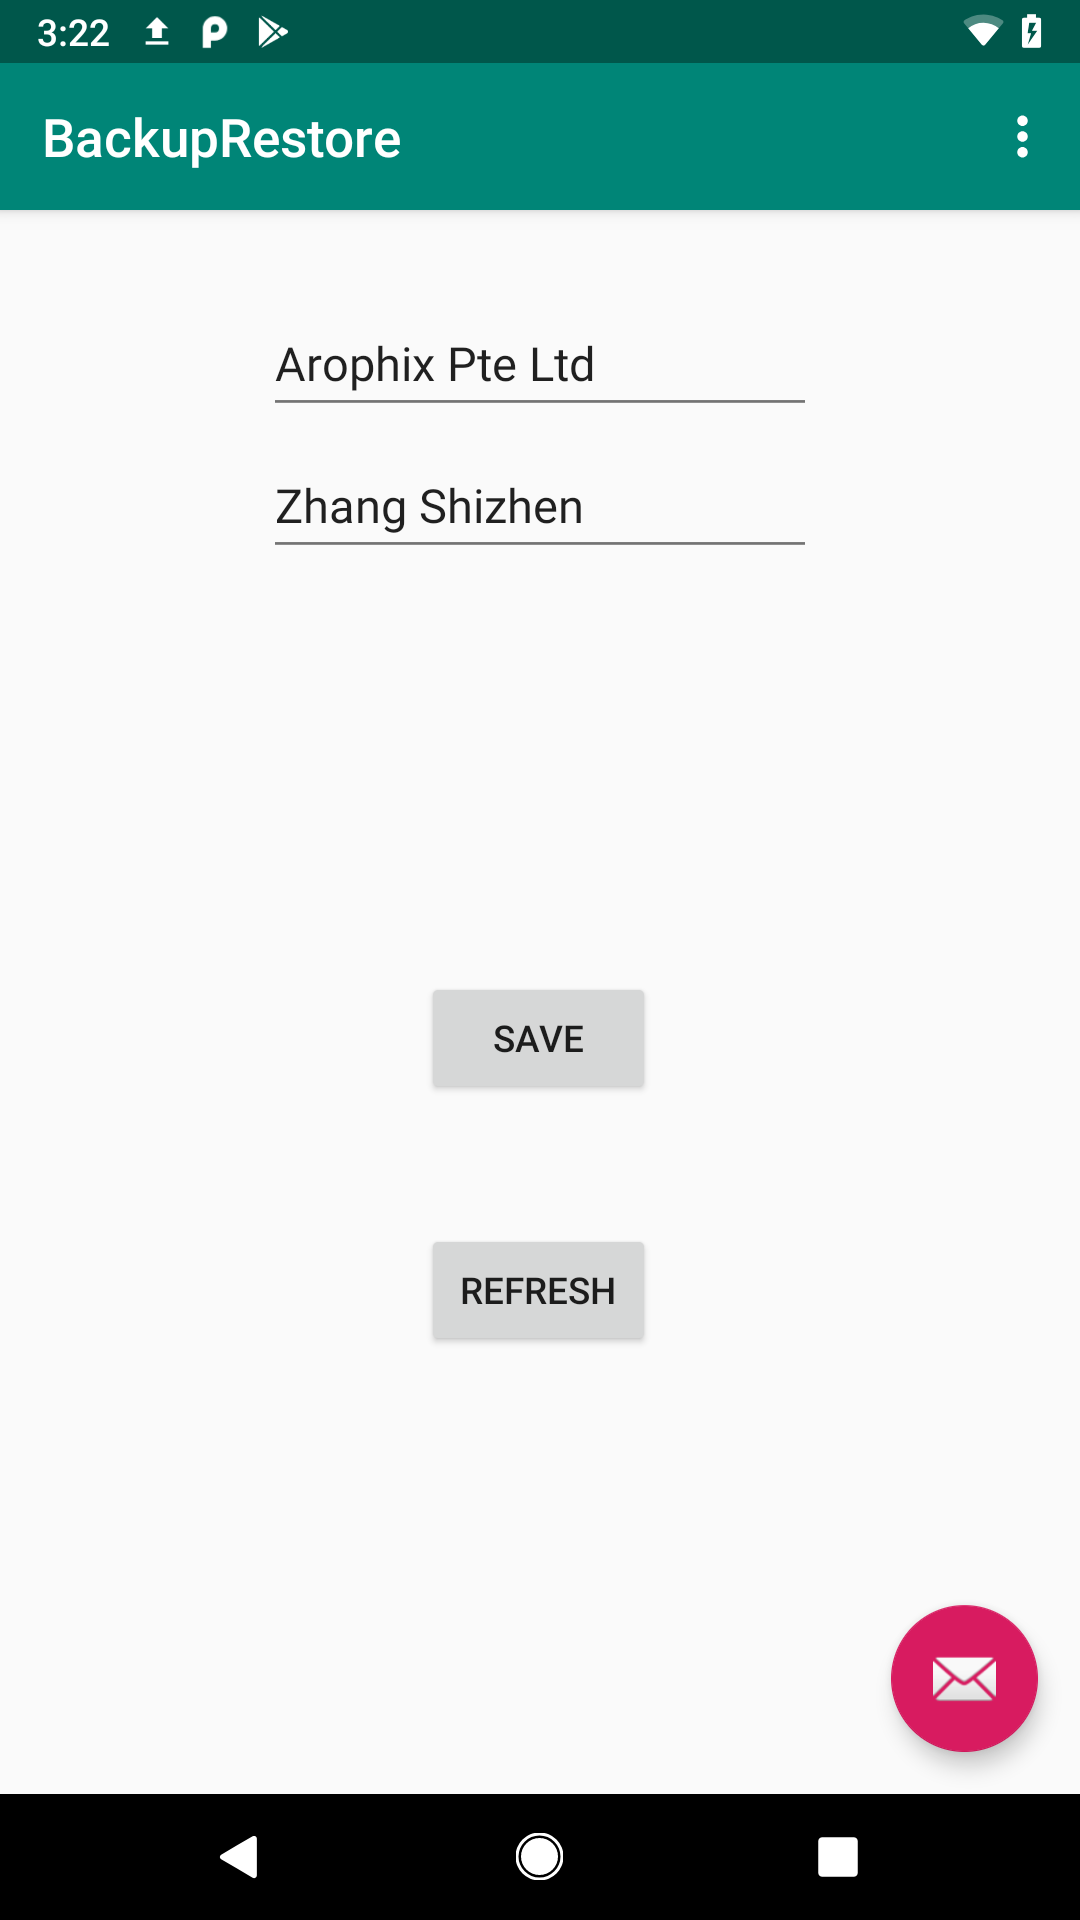 .
. - Verify that the shared preferance already saved correctly. E.g.
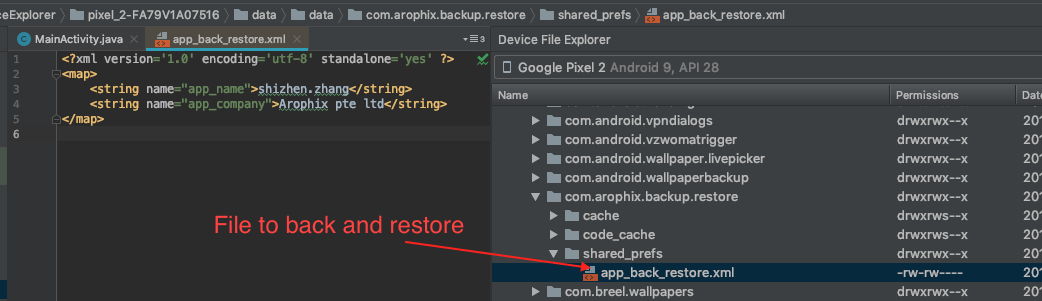 .
. - Perfom a backup.Check availble transport
$adb shell bmgr list transports

  android/com.android.internal.backup.LocalTransport
  com.google.android.gms/.backup.migrate.service.D2dTransport
* com.google.android.gms/.backup.BackupTransportService
Run the backupnow command
#On Android 7.0 or later
$adb shell bmgr backupnow com.arophix.backup.restore
You should see something like below:
Running incremental backup for 1 requested packages. Package @pm@ with result: Success Package com.arophix.backup.restore with progress: 512/1024 Package com.arophix.backup.restore with progress: 1536/1024 Package com.arophix.backup.restore with progress: 2560/1024 Package com.arophix.backup.restore with result: Success Backup finished with result: Success - Perfom a restore.Clear the app storage first.
.png)
Check the token name of the dataset to retore using below command
$adb shell dumpsys backup | grep CurrentYou should see something like below, the hex string after
Currentis the token name to use.Current transport clients: 0 Current: 30ebe10fc40cee0aRestore date using below command
$adb shell bmgr restore 30ebe10fc40cee0a com.arophix.backup.restoreYou should see something like below
Scheduling restore: Pixel 2 restoreStarting: 1 packages onUpdate: 0 = com.arophix.backup.restore restoreFinished: 0 done - Verify the data is restoredOpen the app and click on button
REFRESH. You should see the twoEditTextfields are updated to the content restored from GoogleDrive.
